Tuesday, December 30, 2014

A Day in the Life: December 2014

Well December is just about wrapping up and I thought it would be fun to do "A Day in the Life" in the month of December! 

December was a crazy month for me and it usually always is. Between finals, last minute projects, holiday shopping, packing and of course getting sick with pneumonia and strep, I am beyond tired by the end of the month. So to make myself feel better I thought I would write a blog post on some shopping I did recently. 

This month I did a lot of shopping which was much needed since I needed to buy some new winter clothes anyway! (I've outgrown a lot of things recently) I will probably post a separate blog post discussing some of the things I picked up on a recent Target and Plato's Closet trip! But for now I want to share with you a few things I picked up while I was shopping at the King of Prussia Mall this past week because I am more than excited about my purchases! 


So the first store I went to while I was at the King of Prussia Mall was of course Lilly Pulitzer! Probably my favorite store in the entire world! I actually wasn't planning on purchasing anything special while I was there. I was just in the mood to browse and maybe pick up a couple koozies but of course while I was there I ran into something very special.....


The Getaway Quilted Vest and the most gorgeous Sarasota Tunic I have seen in a long time! Both of which were on sale! I could not believe I found the Getaway Vest in particular since I had actually had my eye on it for the longest time but it sold out online. It was the last Getaway Vest in the store in a size Extra Extra Small so I decided to try it on and believe it or not, it fit! (Thank the Lilly Gods!) I wish it was in an Extra Small because I would have been able to layer shirts with it but the Extra Extra Small will do. I asked one of the lovely ladies at Lilly to check to see if they had any Extra Smalls or Smalls available at any of the other stores but they were actually sold out of the vest in 
 every Lilly store in the country which was beyond crazy! 

As for the Sarasota Tunic, it fit me just perfectly (I tried on a Small). But at the end of the day I decided to just go with the Getaway Vest since it was still somewhat pricey. It is by far one of the most amazing Lilly items I own! The gold buttons are such an amazing detail and the "Multi Hot Spot" print in the inside of the vest is gorgeous.

The next store I decided to stop by was Vineyard Vines!  This store was beyond crowded and the line was out the door so I didn't actually get a chance to buy anything. I had my eye on a Vineyard Vines Travis Tumbler but I wasn't going to wait in line just for that.


After Vineyard Vines I went into L.L.Bean to look for the Bean Boot key-chain which I found but in a red color! I decided to buy it since it was so darn cute and it was only $7.95! (How cute is that little bean boot?!)


After L.L.Bean I went to Francesca's which is my go-to store! I saw this really cute jewelry tray while I was browsing! I almost bought it but I practiced self control! (Even though I might secretly go back and buy it!) 


 After Francesca's my boyfriend and I decided to head on home since the Mall was getting really crowded! After our shopping trip we decided to go on a little picnic since it was so beautiful outside. And there is truly nothing better than WaWa hoagies (subs) and fresh fruit for lunch! 


After dinner we decided to go on a walk around the neighborhood because the sun was shining and it was so warm outside! (Reppin that Bama! Roll Tide!)


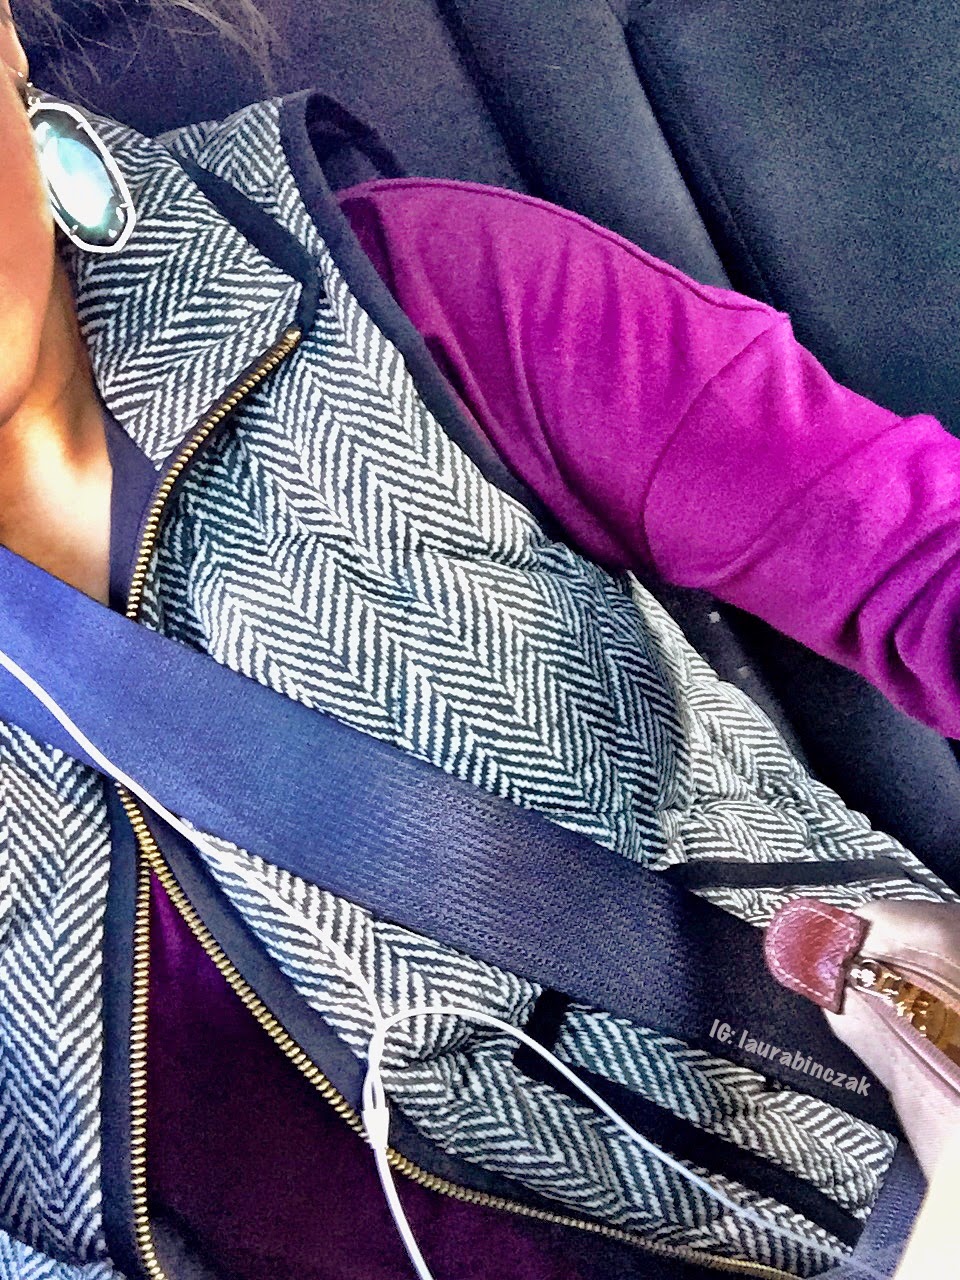
When we got home we just relaxed and watched a couple movies! I also cleaned my Kendra Scott earrings since I wore them out earlier that day! (How gorgeous are they?!) 


As for some outfit details! I wanted to be comfortable walking around the mall so I opted for a purple pinko top I bought at Kohls (on sale now for $6.99), my J.Crew Herringbone Vest, some basic black leggings, my Longchamp Les Pliage Bag in Beige, and my new Kendra Scott Danielle Earrings in Mystic Iridescent.


I hope everyone did some shopping of their own this month! There were so many great deals going on! I'm excited for January to roll around so I can do even more shopping! 

-Laura

Saturday, December 27, 2014

Monogram Push Pin Art

It is no secret that I spend a majority of my time on Pinterest (I am addicted!). So just recently I was browsing Pinterest in search of some affordable and creative decor ideas for my apartment back at school. As I was browsing I stumbled upon a blog post that showed you how to make artwork using push pins! I thought to myself what an amazing idea! I decided to go off the blog post I found and put my own little spin on it. 

I have always wanted a wooden monogram above my bed but the only problem is they can be kind of pricey! So I decided it would be cool to create a monogram using push pins.

This push pin monogram art took me a couple hours to complete (might have taken me longer if my mom didn't help! Thanks mom!) but it was well worth it. The finished project came out better than I had expected! 


What you will need

1. Gold Thumb Pins--You can buy these basically anywhere! I bought them at my local grocery store for $1 and they came in a pack of 100. (I used around 500, just depends on how big you want to make your monogram)

2. Fabric-- I suggest using fabric that has a little more texture to it but isn't too thick because you want your push pins to stay in. (I used old curtains laying around my parent's house)

3. Foam Board-- I bought my foam board at my local A.C. Moore store for about $2.99! They have all sorts of sizes but I used the 20 by 30 foam board! 

4. Hot Glue Gun and Hot Glue Sticks--You will need this to glue the fabric to the board.

5. Scissors--You will use these to cut your fabric if you need to!  

6. Pencil-- You will use this to trace your monogram!

7. Ruler-- It is important to be precise when doing this project! You don't want your monogram to be uneven.

8. Tissue Paper--You will use this to trace your monogram on! I suggest using white tissue paper but I used a baby pink and it worked out okay for me! Just make sure it is somewhat of a light color.

9. A picture of your monogram-- You will use this to help you get an idea of what your monogram should look like. I used one of the monogram apps called "Monogram It" I have on my iPhone to help me design my monogram. I drew mine free hand but if you want you can always print your monogram off and trace it!

Shall we begin?!.......

So to start off I laid out some of the items I will be using for this project on the table just to get a general idea of all the things I need and plan on using. That way I don't have to stop midway through my project to look for something! 


Next you are going to lay out your foam board and cut a piece of tissue paper to the desired size, you can make the tissue paper as big as your foam board or you can make it smaller (I made mine the exact same size of my foam board).

Once your tissue paper is laid out you are going to begin to measure the sides as well as the top and bottom of your monogram letter so they all come out even, this will help you get an idea of where to stop and start the monogram letters (I did my "L" and "M" 3 inches from the top and 3 inches from the bottom, I did my "B" 2 inches from the top and 2 inches from the bottom so it would appear bigger, and as for the side of the "L" and "M" I made them 2 1/2 inches from the sides). *I forgot photos for this step*

Once you are finished measuring out your monogram, place the tissue paper onto the foam board. 

 You can now begin to trace your monogram. Like I said above I drew my monogram free hand but you can always trace it if you want. 

Once your monogram is complete you can now take the tissue paper off of the foam board and begin to place the fabric onto the board. Once you have fit the foam board with the fabric as desired you can use your hot glue gun to glue the fabric to the foam board (The picture below are what the back of your foam board should look like). 


Once you have glued the fabric to the board you can place your monogram tissue paper back onto the board and begin pinning the key points of your monogram letter (Such as the top of the "B" or a curve on a letter, it should look like the image below once you are complete).
This will act as a guide when you begin pushing the pins in.


Now you can begin pinning your letters! I will warn you that this will take time and patience but take your time! The end result will be well worth it! (It took me around 2 hours to complete this project) You will probably mess up a few times but you can always go back and fix it if you need to. 


Once you are finished pinning your letters you can start removing the tissue paper. Be very gentle while doing this so you don't pull the pins out. Juts slightly pull it like you would if you were tearing a piece of paper in half. 


When you have finished tearing the tissue paper off your letters, it should look very defined, now is the time to go back and fix what needs some fixing! 

Of course mine did not come out perfect but it came fairly close and I am very happy with the result! I plan on hanging this above my bed when I get back to my apartment!


Wednesday, December 17, 2014

Top 10 Must Have Beauty Products

Hello Everyone!

It has been too long since my last blog post! I have been so busy with school, finals and to top it off I was sick with pneumonia and strep throat which was no fun at all! But now that I am feeling much better and I am officially on Winter Break I am determined to get back into blogging. So since this is still just the beginning of my blogging experience I began writing down some ideas for future blog posts. And let me just say that my ideas are endless! There are so many things I want to write about, I don't really know where to start! So after contemplating on what to write about I decided on something that I know best and that's beauty products.

To put it simply....I am a beauty junkie. I love beauty products! I am not ashamed of it one bit. I love looking my best and feeling my best at all times. My makeup collection is extensive and it continues to grow almost everyday (I'm not kidding!). This list consists of all sorts of things, from moisturizers, to makeup, to hair care products. Let me know what some of your favorite products are!

 Let the countdown begin!


Top 10 Beauty Products


1. Philosophy's 'Purity Made Simple' One-Step Facial Cleanser  (16 oz. $35)
I am absolutely, without a doubt, in love with this product. When I first bought it (which was last year....I know! It lasted forever!) I wasn't blown away by it but after using it for so long I have noticed such a difference in my skin. My skin tone has evened out and I never struggle with random breakouts anymore. I would recommend this to everyone! The price tag is a little hard to justify but trust me it is worth every penny!
 
 2. Vaseline ($5)
A classic beauty product every girl needs to have in her beauty cabinet. My skin is somewhat dry so sometimes I suffer from tight/itchy skin which is no fun. I've tried all sorts of facial moisturizers but nothing was working for me. One night I decided to try Vaseline around my nose area and when I woke up the next morning the skin around my nose felt so soft and moisturized. So the following night I put it all over my face and that was it.... I was addicted. 

3. Smith's Rosebud Salve ($7)
 I am addicted to lip balms. I think it's safe to say I have a whole drawer in my makeup collection dedicated to lip balms. But out of all the lip balms I own, Smith's Rosebud Salve is by far my favorite. You can purchase it either in the tin version or the tube version (I prefer the tube because it's easier to use). I have gotten almost everyone I know addicted to it. I also read once that it is Beyonces' favorite lip balm which is always a plus (and may or may not have been the reason I bought it in the first place)! 

4. Anastasia Brow Wiz in 'Brunette' ($21)
 My brows and I have always had a love/hate relationship. There have been times in my life where I completely shaved half of my eyebrows off (Don't ask me how that happened!). The Anastasia Brow Wiz is amazing. It is so easy to use and gives your brows a very natural look. I have repurchased it 3 times in the past couple years and it has never disappointed me.

 5. St. Tropez Bronzing Mouse (16 oz. $35)
Let me just say, being tan is a great thing. I don't really have an issue with getting some color but during the Fall and Winter months my color starts to fade a bit which is not okay with me. I like to keep my color all year round because I am crazy like that! The St. Tropez Bronzing Mouse is my holy grail self tanning product. I don't usually use it in the Spring or Summer because I get naturally tan but during the colder months this product is a must, in my opinion.

6. L'oreal Magic Skin Beautifier BB Cream in Medium ($7)
I have a BB Cream obsession to put it lightly. I have tried soooo many, high-end and drugstore BB Creams it's not even funny. I like to wear makeup everyday but by no means do I "cake it on". I'm a full time student with an extremely busy schedule so I don't have time to put on a ton of makeup every morning and keep up with it throughout the day. The L'oreal Magic Skin Beautifier BB Cream is a must. It looks so natural and it keeps my face oil-free most of the day. Sometimes it's all I wear because the coverage is great and it's so lightweight! (And affordable)

7. MAC Pro-Longwear Concealer in NW 20 ($20)
 MAC Pro-Longwear Concealer is the concealer of my dreams. I love this concealer to the moon and back! It is so long wearing and looks so natural I couldn't ask for anything more. You only need a little bit to cover even the worst imperfections. If you don't own this concealer you should!

8. Benefit's 'Hula' Bronzer ($27)
 One of my must have makeup products is bronzer! I cannot live without it! I have been on a mission since I first started wearing makeup to find the perfect bronzer and "Benefit's Hula Bronzer" comes very close. It's the perfect shade of brown and is completely matte which I love! It looks so natural. I can wear it just about all year round!

9. Aussie '3-Minute Miracle' Deep Conditioner ($4)
 A deep conditioner is a must have product for me. My hair is one of my favorite features and I try to take care of it as best as I can. I love the Aussie '3-Minute Miracle' Deep Conditioner! It is affordable and makes my hair feel amazing! It also smells like a tropical vacation!


10. Lush 'Mask of Magnimity' ($23) 
When my skin needs an extra pick me up I always turn to my Lush 'Mask of Magnimity'! It smells amazing and keeps my skin hydrated. Anytime my skin looks tired or if I start to suffer from random breakouts  I just do a quick facial mask and I'm good to go. This mask has ground up aduki beans in it so it also acts as an exfoliator which is also nice so you can use it on any part of your body for a little extra love!